Typically, the customer’s ERP or procurement system are configured to send orders to the merchant’s inbox where there are forwarding rules to enable the automated order processing.
For more information on this, please check out the Email Forwarding Rules document.
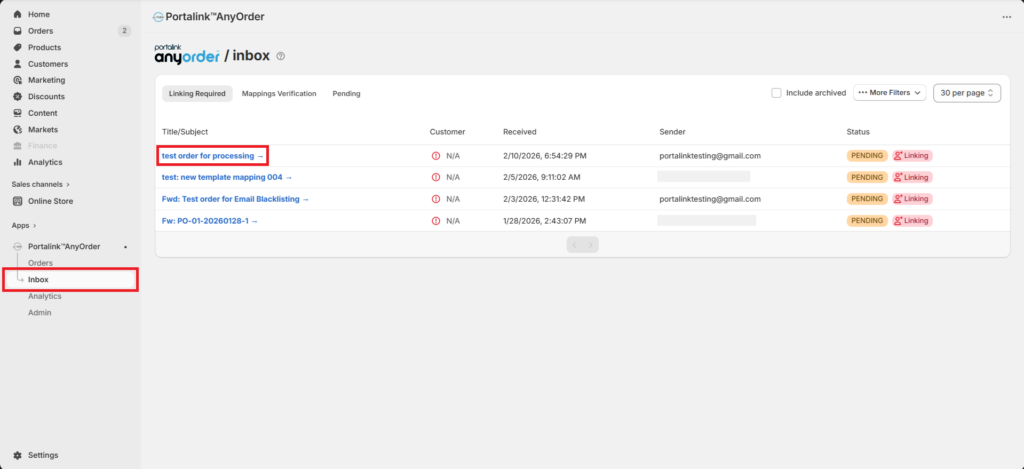
To process an order, perform the following steps:
- In the Inbox page, open a new order.
- Link the order to the correct account by choosing the email identifier and selecting the company.
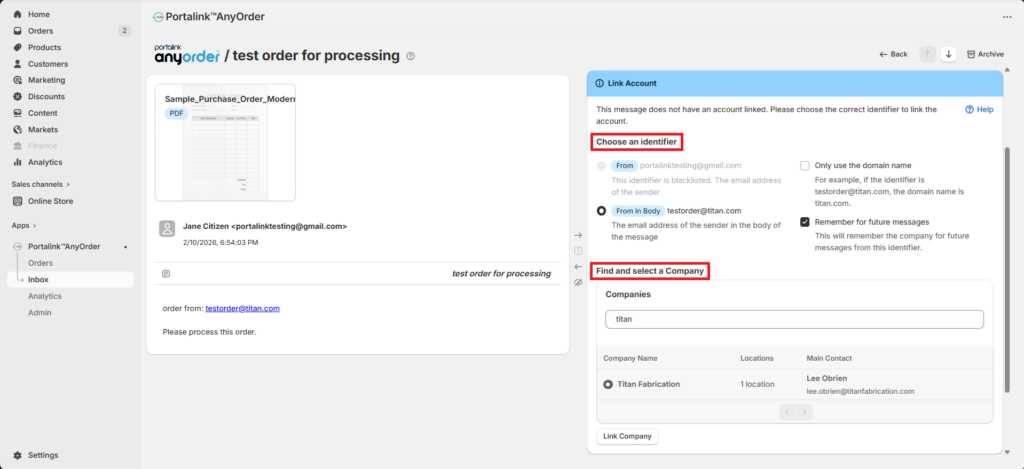
For more information on this, refer to the Account Mapping document.
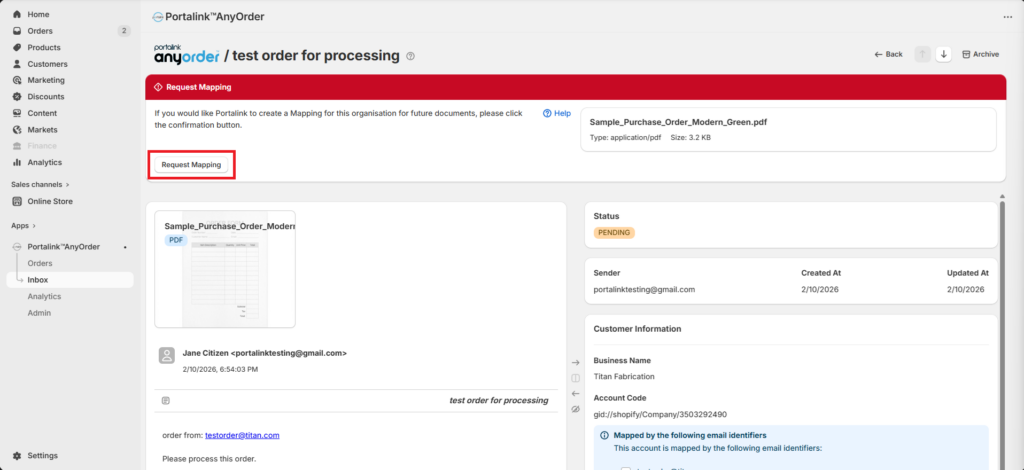
- After linking the order to an account, the user will be prompted to request the mapping, so click Request Mapping.
- The banner will turn from red to green. Click the Verify button.
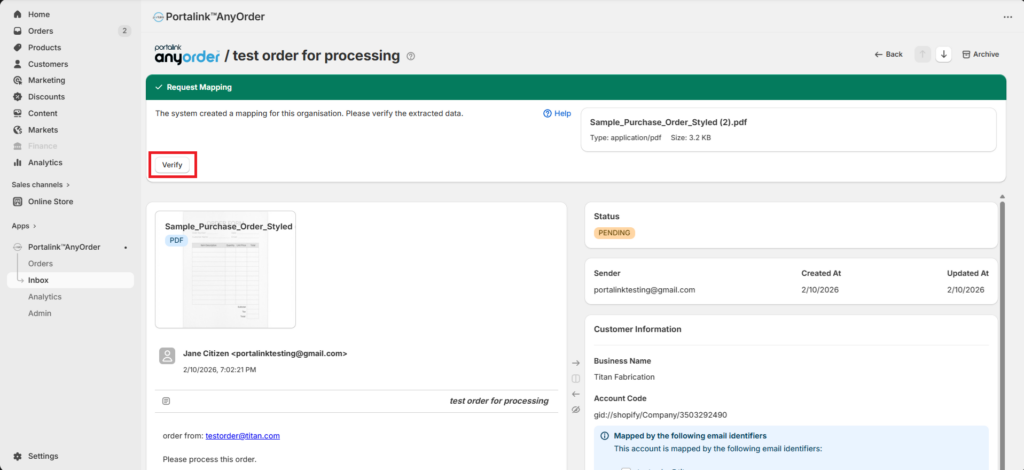
For more information on requesting and verifying mapping, refer to the Mapping Tool document.
- Click the Retry button.
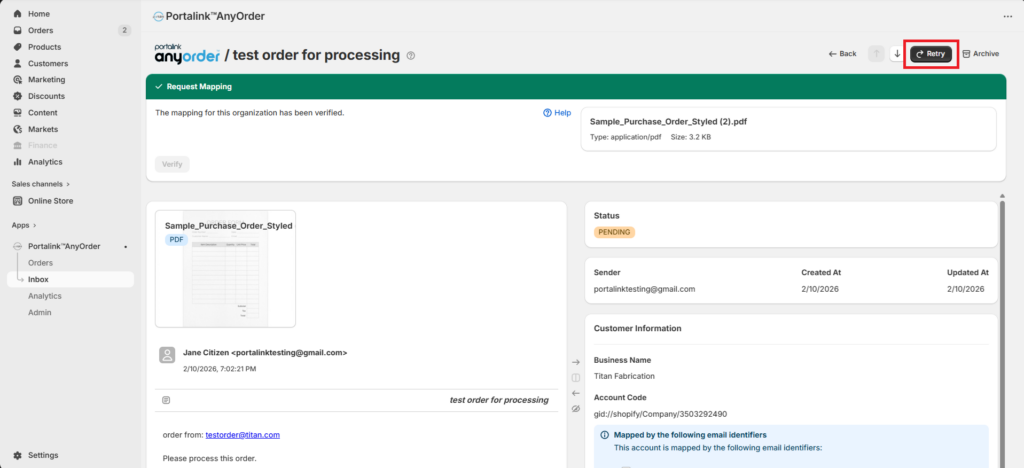
The status of the order will change from Pending to Archived, and the order can now be viewed in the Orders page.
- In the Orders page, open the order.
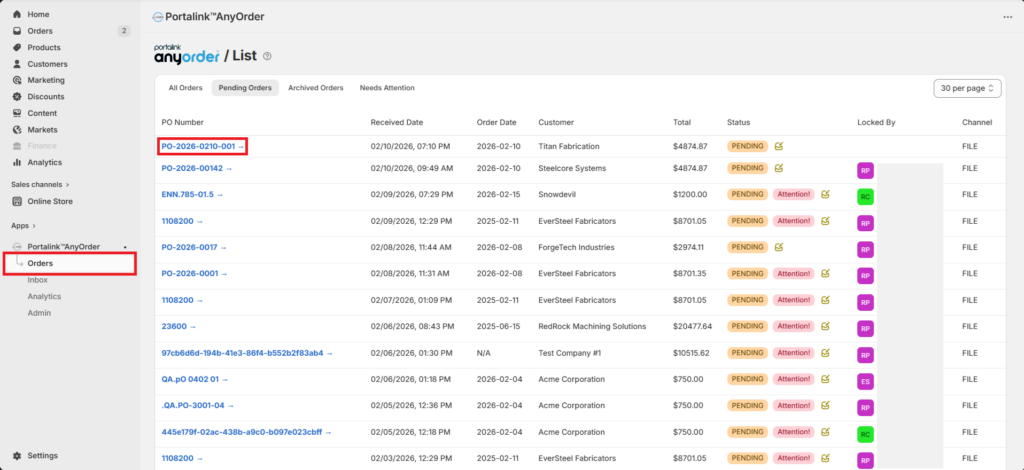
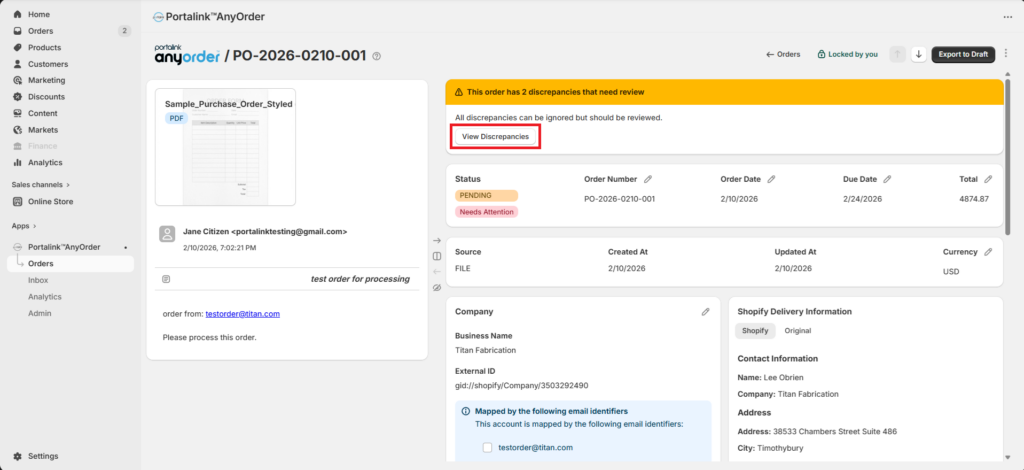
The user may see a message at the top stating the total number of discrepancies to be reviewed, as well as the number of the discrepancies which can be ignored, and/or the critical issues that need to be resolved before exporting the order.
- To view the variances, click on the View Discrepancies button.
- To see the specific discrepancy, click on the Go to field button.
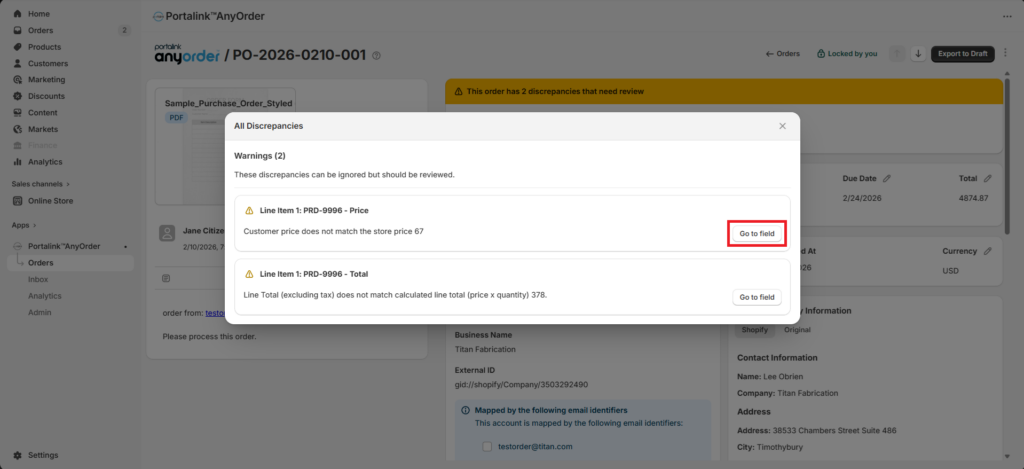
- To edit the information, click the exclamation point. The user may manually input the information, click on Apply Recommended, or tick the Ignore this variance box.
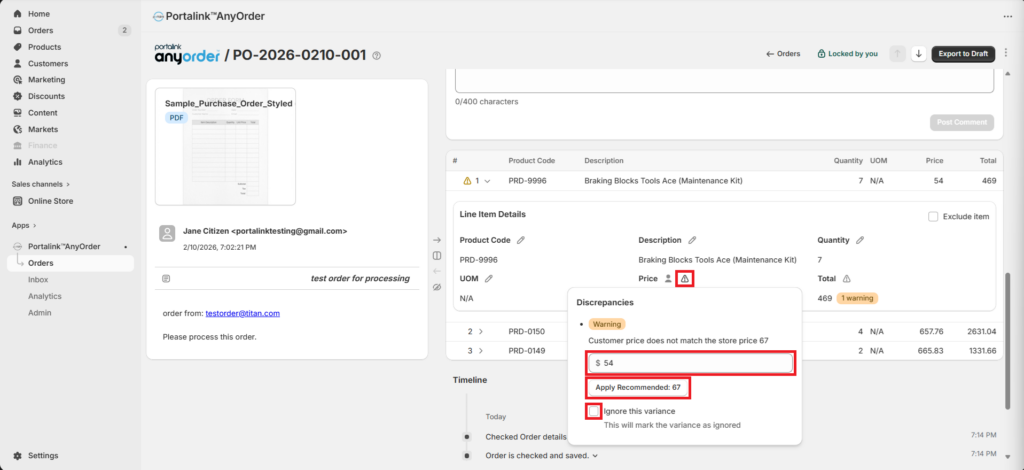
For more information on this, refer to the Business Rules document.
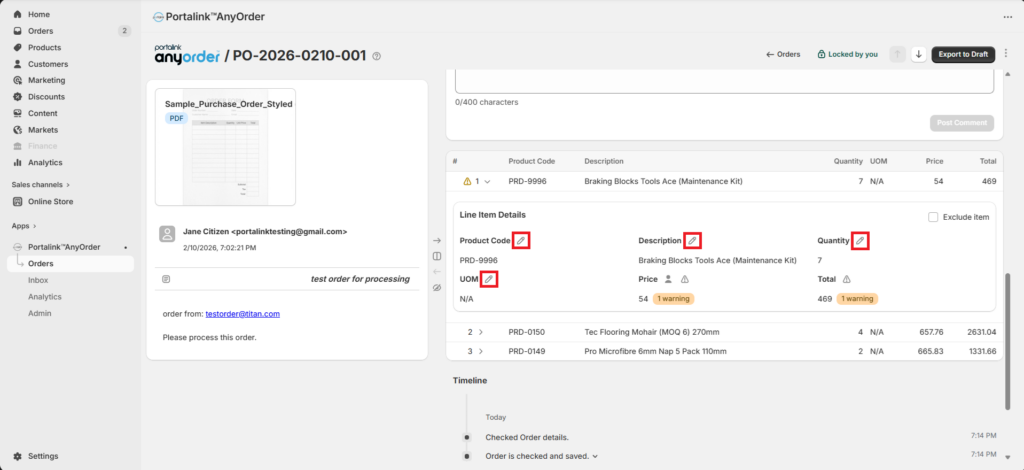
- To modify other fields, just click on the pencil icon next to it.
- To exclude a line item from the export, tick the Exclude item box, then click Save/
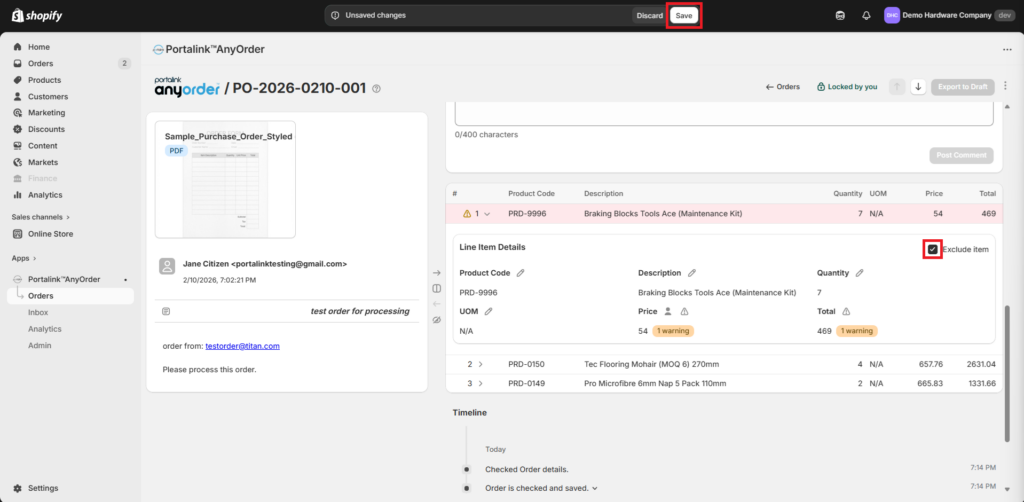
- Click on Export to Draft, then Export.

Once the order is exported to draft, the status will change to Archived and Archived – Read Only. The user will not be able to make changes, and the pencil icon for the fields will be greyed out.
- To view the exported order, click on Orders then Drafts in the Shopify Admin. Open the order.
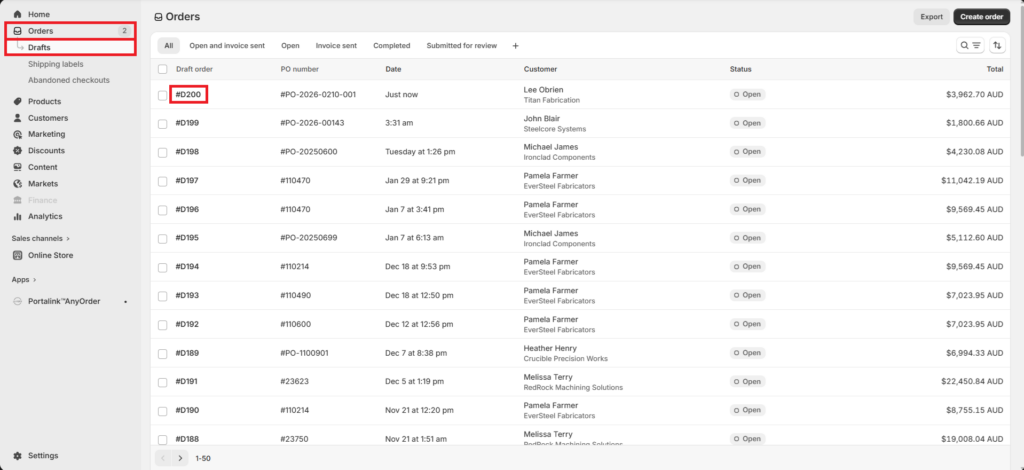
- There are only two line items here since one line item was excluded before the export. In this page, the user can modify some of the fields, like the Quantity, before sending the invoice. The user can also tick the Payment due later box, or add some notes even after the order has been exported.

- At the bottom is the Timeline, or the audit logs when the order was created, validated, and updated.


